Categories
Linux Tutorials

LVM to the rescue

Root problem

I’ve been running Debian 12 for a while on my Linux desktop and recently ran into a big issue: My root volume ran out of space. Never good.

In the past I would’ve taken the path of least discomfort (for me): Clean install, repartition differently, start fresh. Because I’d used LVM when installing, however, I had another option this time:

On small systems (like a desktop), instead of having to estimate at installation time how big a partition might need to be, LVM allows filesystems to be easily resized as needed.

Wikipedia

Goal

I want to expand the root volume by shrinking the home volume a little bit. Let’s see how easy it really is with LVM!

Prerequisites

My environment was an x64 box running Debian 12 containing a single 1TB SSD. I didn’t add any physical drives, I only adjusted the space allotted to the LVM volumes.

Live image

I used a live install image to boot Linux without installing anything. After downloading the image I used dd to copy it to a USB flash drive. When booting on Debian, you’ll need to select the “Rescue mode” and follow the menus to get to a shell. When asked about using a root filesystem, tell it not to mount anything.

Figure out paths and numbers

To make this tutorial generic, we’re going to define four variables. Two for the volume paths, one for the amount we’re going to grow the smaller volume, and one for the amount we’re going to shrink the bigger volume.

Paths

There are plenty of ways to figure out the paths to the volumes you’ll be using, but lvdisplay works well.

shrinkPath = path of volume to want to shrink
growPath = path of volume to want to grow

Numbers

We’ll also need to define the growth amount of the growing volume and the new size of the shrinking volume.

growthAmount = how much we want the volume at growPath to grow
newShrinkSize = current size of the volume at shrinkPathgrowthAmount

Example

We have a root volume we want to grow by 30GB as well as a home volume (currently 900GB) that we need to shrink.

shrinkPath = /dev/debian-vg/home
growPath = /dev/debian-vg/root
growthAmount = 30G
newShrinkSize = 870G (which is 900-30)

Note: Gigabyte units are assumed in this example, hence the G after the 30 and 870.

Steps

⚠️ Complete these at your own risk! Any time you change filesystems you run the risk of data loss, so backup your stuff!

  1. Boot into a recovery mode without mounting any filesystems.
  2. e2fsck -f {shrinkPath} to check for errors.
    • Example: e2fsck -f /dev/debian-vg/home
  3. resize2fs {shrinkPath} {newShrinkSize} to shrink the filesystem.
    • Example: resize2fs /dev/debian-vg/home 870G
    • Important: Be sure to include the appropriate size unit after the new shrink size, like G for gigabytes. See the resize2fs man page.
  4. lvreduce -L -{growthAmount} {shrinkPath} to shrink the LVM volume.
    • Example: lvreduce -L -30G /dev/debian-vg/home
    • Note: Some tutorials accomplish steps 4 and 5 in one go via lvreduce --resizefs but this did not work for me, so I had to break it out into two steps.
    • Important: Be sure to include the appropriate size unit after the growth amount, like G for gigabytes. See the lvreduce man page.
  5. resize2fs {shrinkPath} to extend the partition to fit the volume.
    • Example: resize2fs /dev/debian-vg/home
  6. vgdisplay -C should show {growthAmount} free.
  7. e2fsck -f {growPath} to check for errors.
    • Example: e2fsck -f /dev/debian-vg/root
  8. lvextend -l +100%FREE {growPath} to grow the volume to 100% of the available Volume Group size.
    • Example: lvextend -l +100%FREE /dev/debian-vg/root
  9. resize2fs {growPath} to grow the filesystem to the available space.
    • Example: resize2fs /dev/debian-vg/root
  10. vgdisplay -C should show no free space
  11. You should be all done and free to reboot!
Categories
Scripts Tutorials

ZFS health check in Grafana / Telegraf

I recently set up a ZFS mirror on my home server and found myself needing a way to be alerted if something went wrong. That same server runs Grafana and InfluxDB, and collects various metrics from my other machines (and itself) via Telegraf. Since I already have email alerts set up with that stack, it felt simplest to use it for this solution.

A really simple script

#!/bin/sh

# Compares the expected zpool status output with the actual status.
# Copy to a global location such as /usr/local/bin so it's accessible to Telegraf.
# Note: This can provide a false-postive if the output of the command changes, which is not guaranteed to be stable.

# Returns 0 for "false" (not healthy), returns 1 for "true" (healthy)
# Chose using integers over booleans due to how Grafana handles alerts.

OUTPUT="zfs_status,host=[HOSTNAME HERE] healthy="

if [ "$(zpool status -x)" != "all pools are healthy" ]; then
	OUTPUT=${OUTPUT}"0i"
else
	OUTPUT=${OUTPUT}"1i"
fi

echo $OUTPUT

There are similar scripts floating around on the Internet so I used those for inspiration. The only difference with mine is that it outputs the InfluxDB Line Protocol.

host= is just a convenient tag where you could put your box’s hostname (or call the hostname command and interpolate it).

Everything else should be explained by the script, including the possibility of false positives. Feel free to rename the zfs_status field to anything you wish. In my instance I use tws_zfs_status to differentiate custom fields I’ve created and possibly prevent namespace conflicts.

The Telegraf side

Telegraf has a super handy exec input where you can run arbitrary commands, so that’s what we use:

[[inputs.exec]]
  commands = ["sh /usr/local/bin/zfs_check.sh"]
  timeout = "5s"
  data_format = "influx"

When Telegraf collects data from its inputs it will write a one or a zero for its zfs_status field.

And finally, Grafana

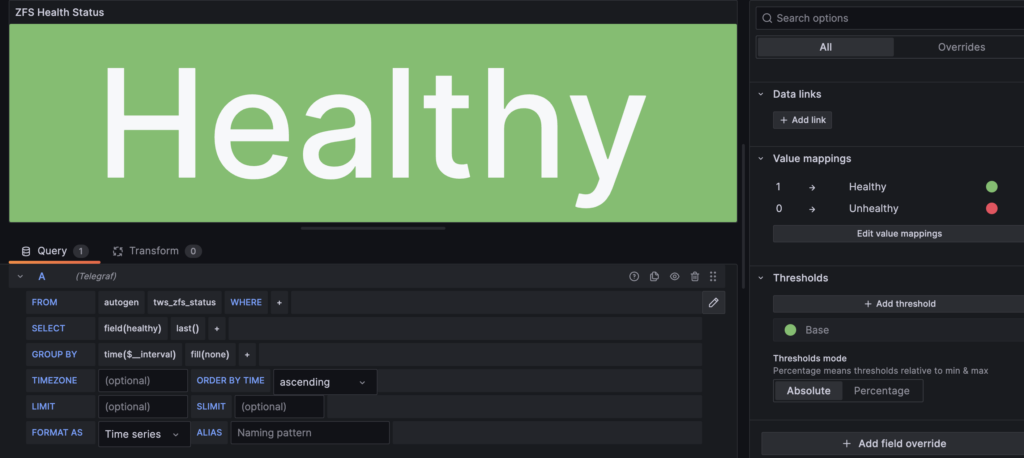
The basic setup in Grafana is:

  • Stat type
  • Grab the last value
  • Map 1 to “Healthy” / green, 0 to “Unhealthy” / red
  • Set up an alert for when the value is less than 1

That’s basically it! It’s a really good idea to test it by temporarily tweaking the script to output a 0 and waiting for an email to arrive. 🙂

Categories
Apple Retro Computing Tutorials

Power Mac G4 + PC Radeon 9000

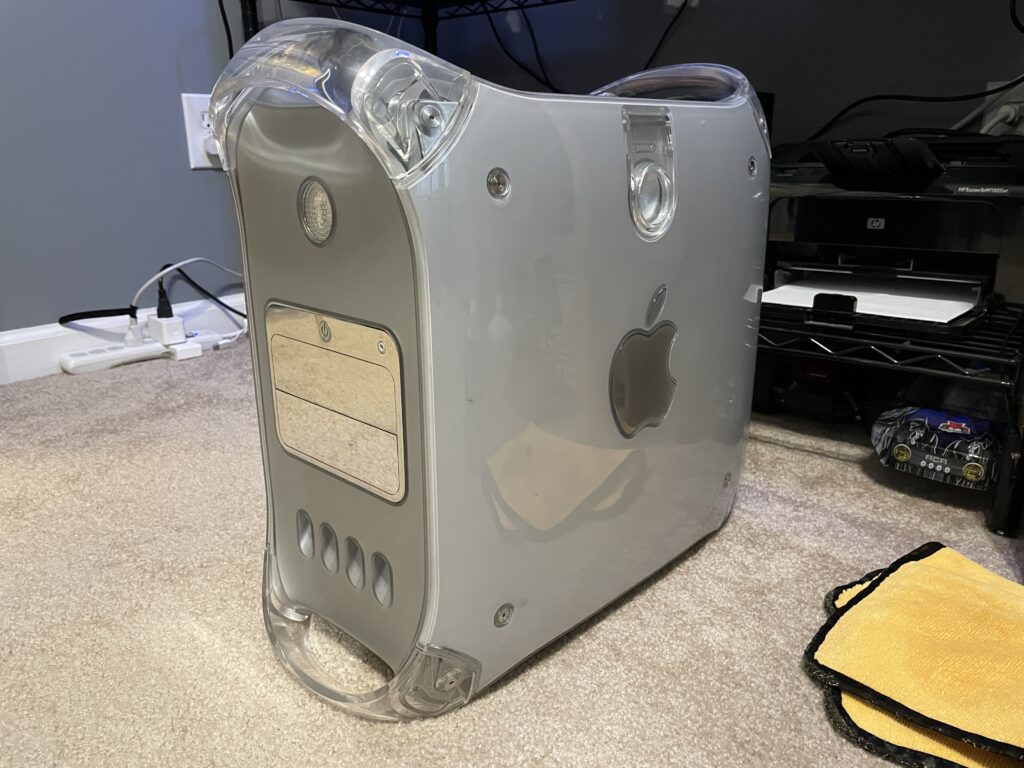
I’ve acquired yet another retro machine – this one a Power Mac G4 MDD. There are a few reasons I find it appealing:

  • It’s one of the last machines that natively supported Mac OS 9
  • It has the benefits of a modular tower, which makes repairs much easier (I’m looking at you iMac G4)
  • It’s cool

Surprisingly it started on the first boot attempt! The PRAM battery was dead, which was expected, but other than that it seemed perfect… for a while. The next day when I tried to boot it I saw only a black screen, so the troubleshooting started.

Troubleshooting

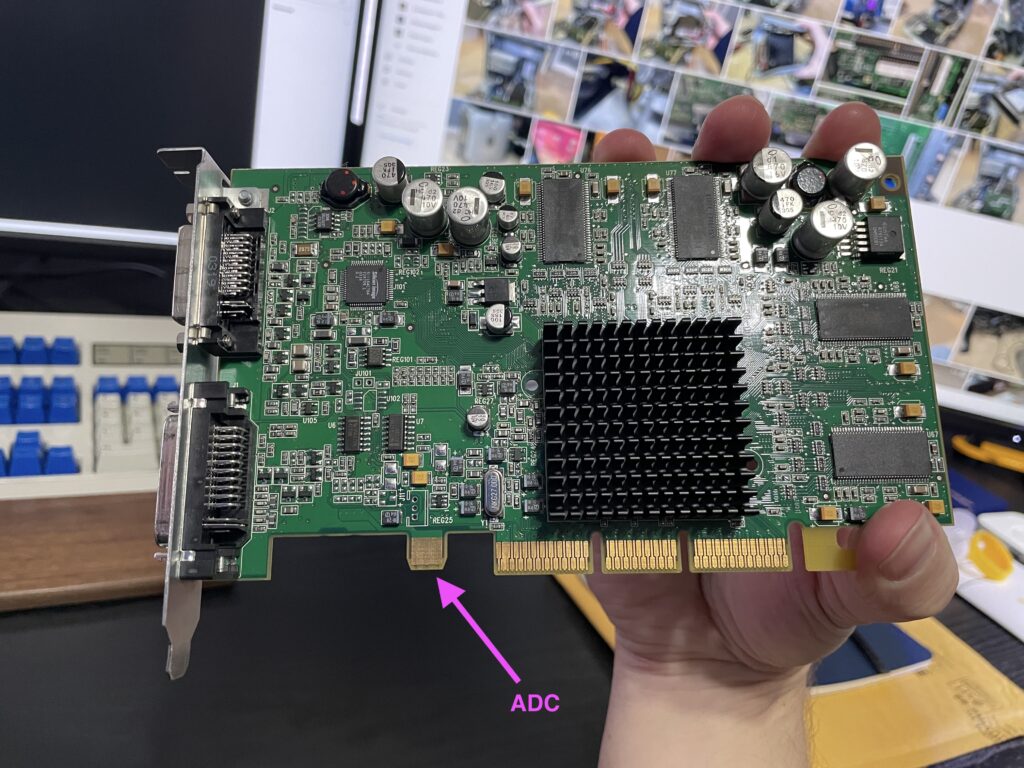
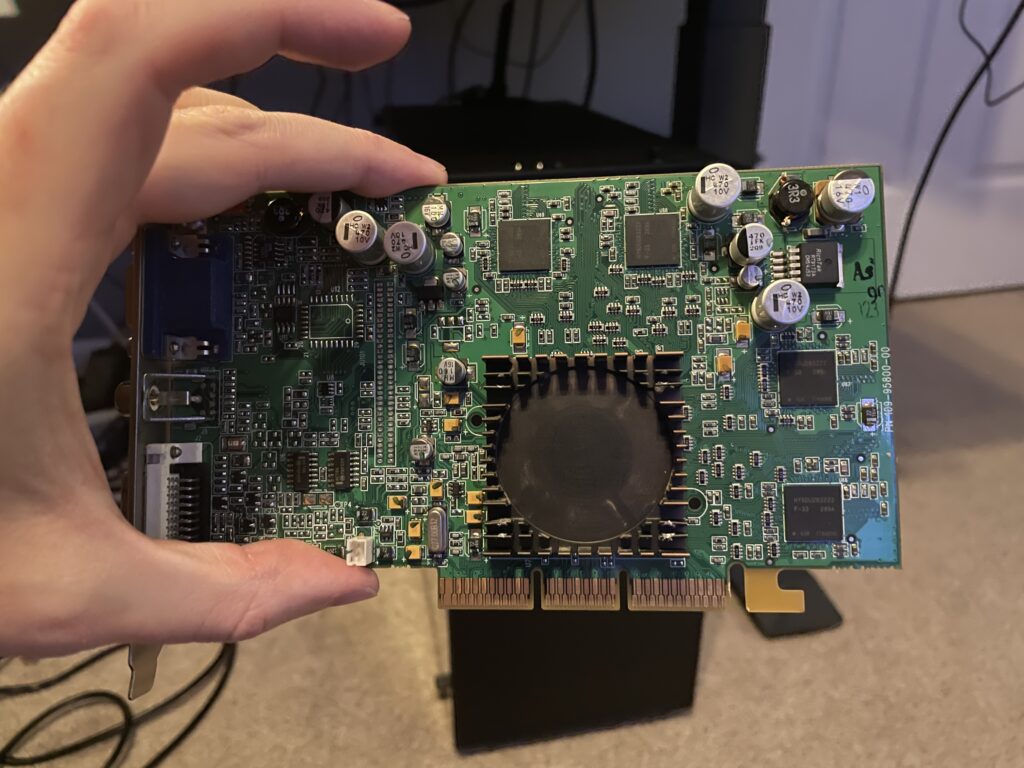
To keep things brief it all came down to two components in my case (literally) – either the power supply or the video card, which is an ATI Radeon 9000 Pro Mac Edition 64MB.

Dead Radeon 9000 Pro Mac Edition with ADC connector

After trying some spare PC AGP cards I was able to boot consistently with a PNY GeForce 2, telling me the power supply is probably OK. I could’ve stopped here but the graphics performance was terrible with the GeForce 2 and I never got hardware acceleration to work.

I attempted to flash a new ROM to the card but kept getting rejected, so I decided to go in another direction.

Replacement research

There are a few sites that were extremely helpful in this quest to determine what cards could be used in the Power Mac:

If going with a PC version of a video card some will need to be re-flashed with Mac firmware and some also need pins disabled.

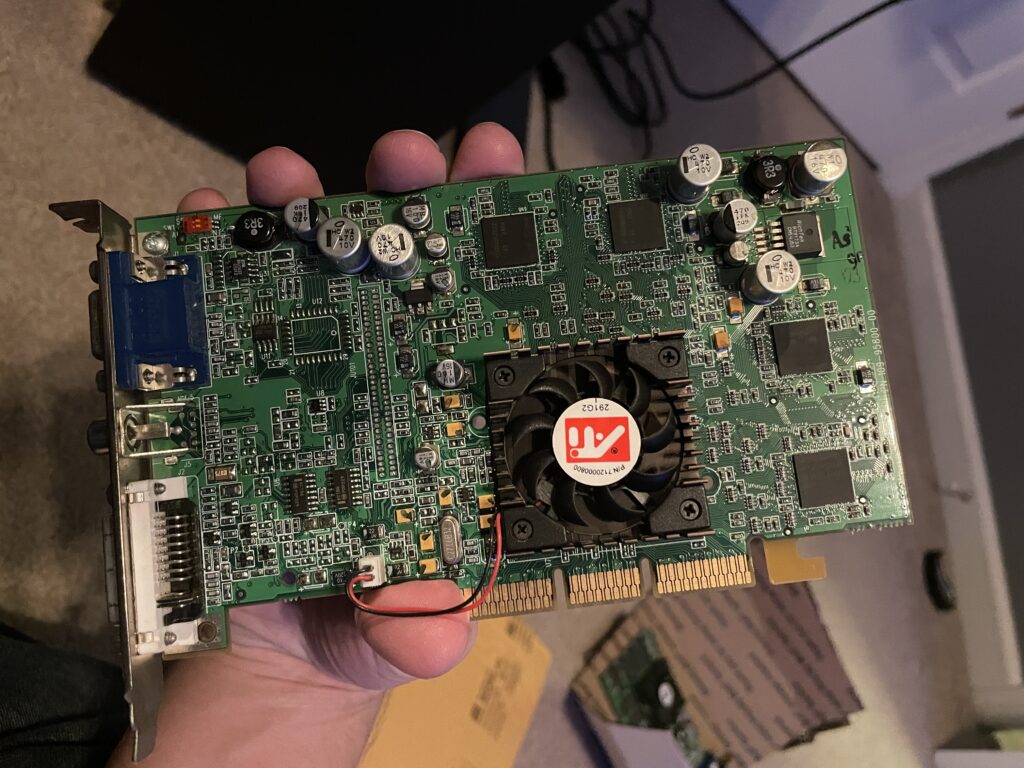
I decided to go with another Radeon 9000 but not a Mac Edition – one for PCs only. This would mean higher availability in the used hardware market, a lower cost, and no work to disable pins. It also meant double the VRAM – 128 MB instead of 64.

I wouldn’t be utilizing the extra ADC power port in the AGP slot nor would the card supply an ADC connector, but for me that’s OK.

Initial state

When I ordered the card from eBay the description mentioned a failed fan so I needed to address that first.

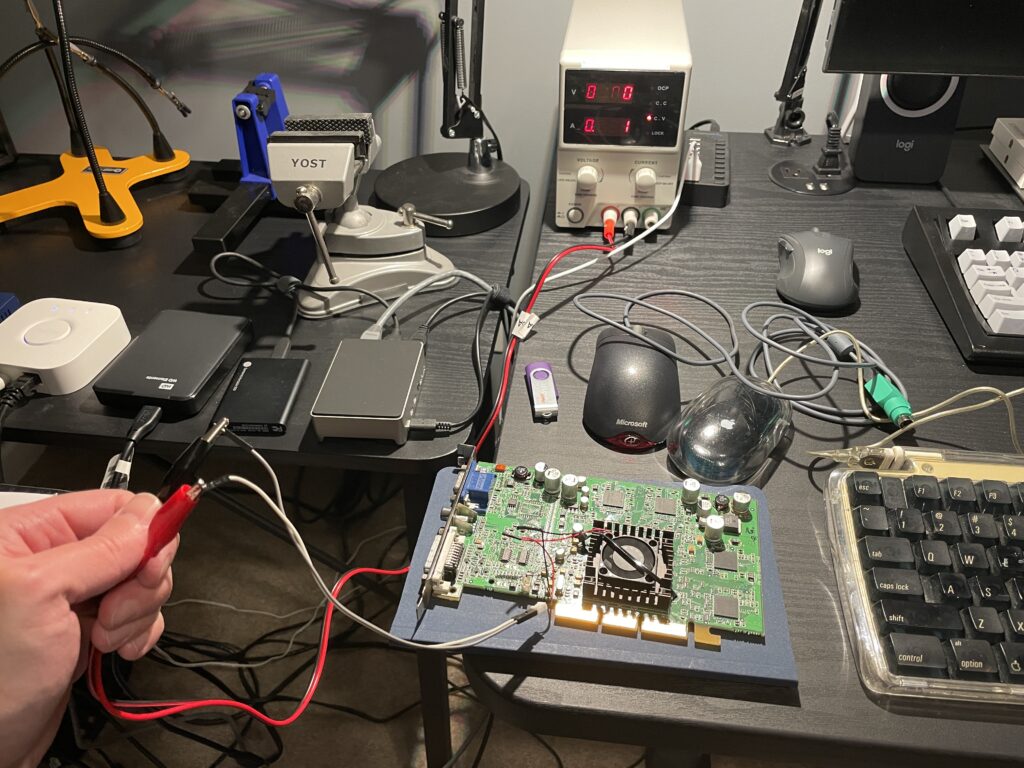
The board’s connector outputs 5V DC and most of my other cards do 12V, but I found a spare fan I’d used for a Raspberry Pi that would work. It’s a bit of a rig at the moment, but a wire tie holds the fan tightly to the original heat sink.

Testing the replacement 5V fan

Once I was sure the new fan setup was working I popped the card into the Mac just to see what would happen. Turns out, nothing. Just a black screen. I don’t think Mac OS 9 even booted.

Fixed in a flash

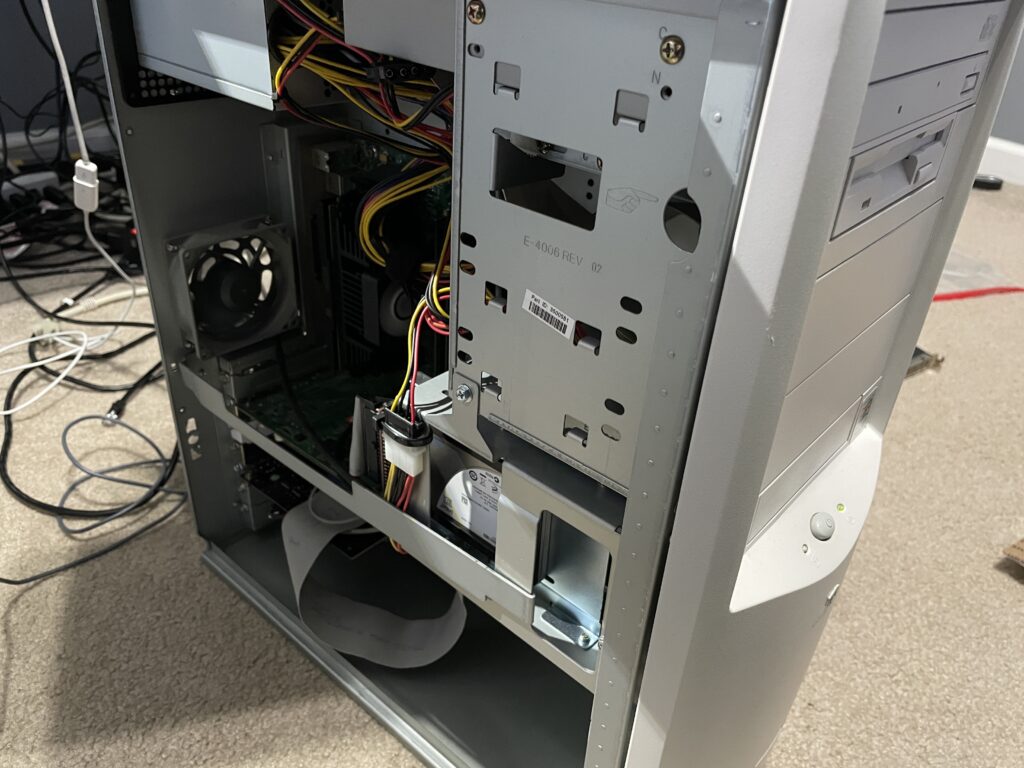
I pulled the card out of the Mac and inserted it into one of my trusty Gateway Slot-1 machines with an AGP port to flash it with the Mac firmware.

Gateway tower with the Radeon 9000 inserted

The PC needed two files:

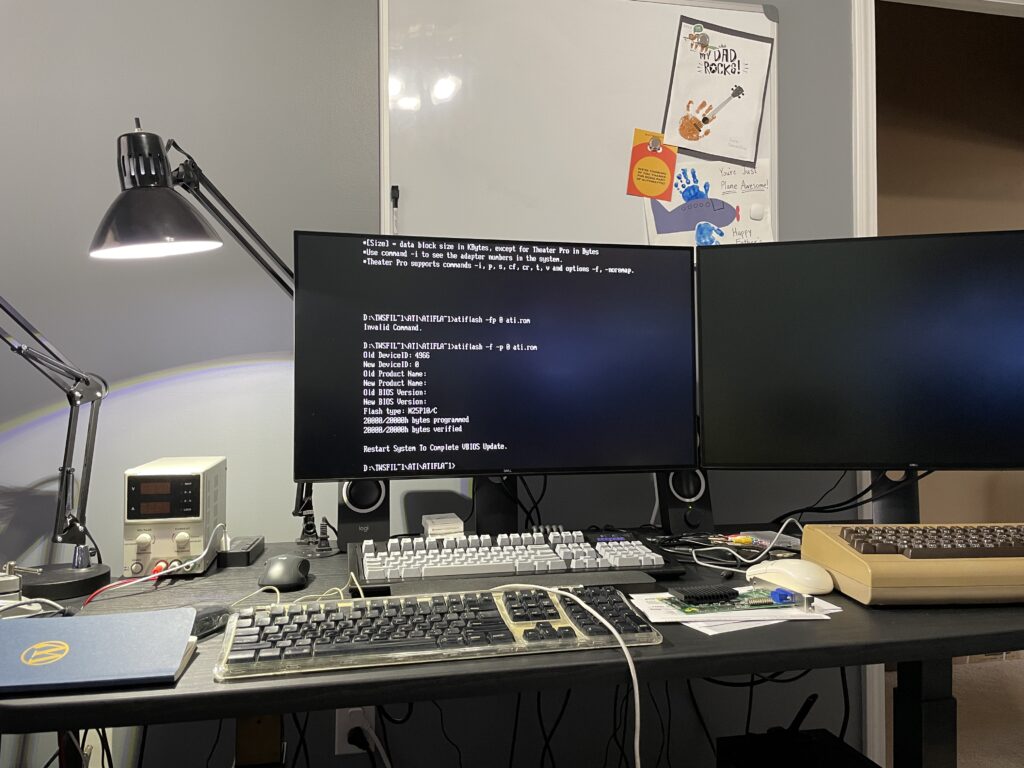
After transferring the files I booted into DOS and followed this sequence in the directory where I’d stored the files:

  1. atiflash -i to make sure the adapter was detected and learn the adapter ID (0 in my case).
  2. atiflash -s 0 backup.rom to make a backup of the PC ROM.
  3. atiflash -f -p 0 [mac_rom_filename.rom] to force-write the Mac ROM firmware.
Writing the Mac firmware to the video card

I then removed the card from the PC.

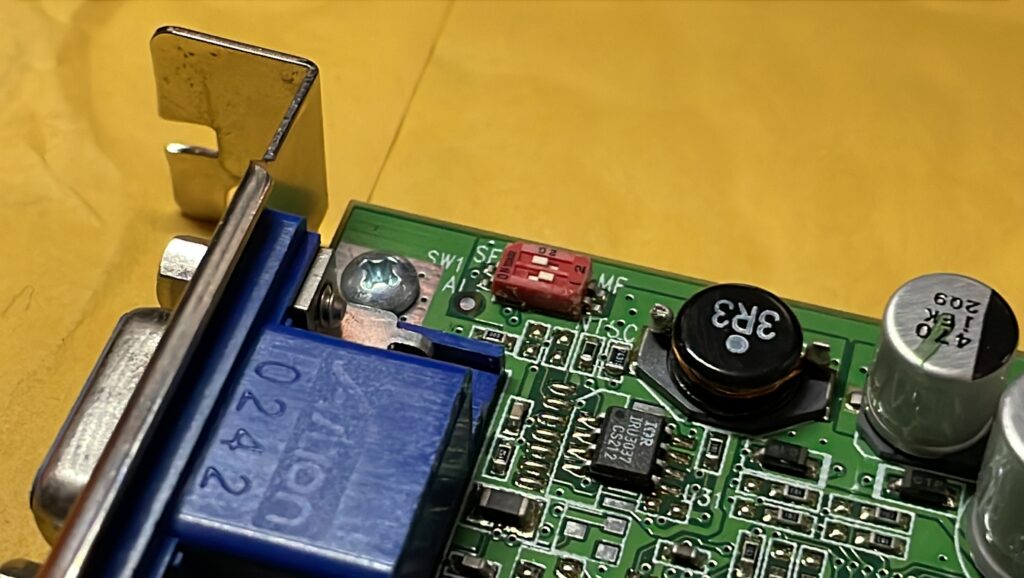
Flip the switch

The last step to prepare the card for the Mac was to remove the protective tape at the top left and flip switch 2 (the top one pictured) from MF to SF.

Success!

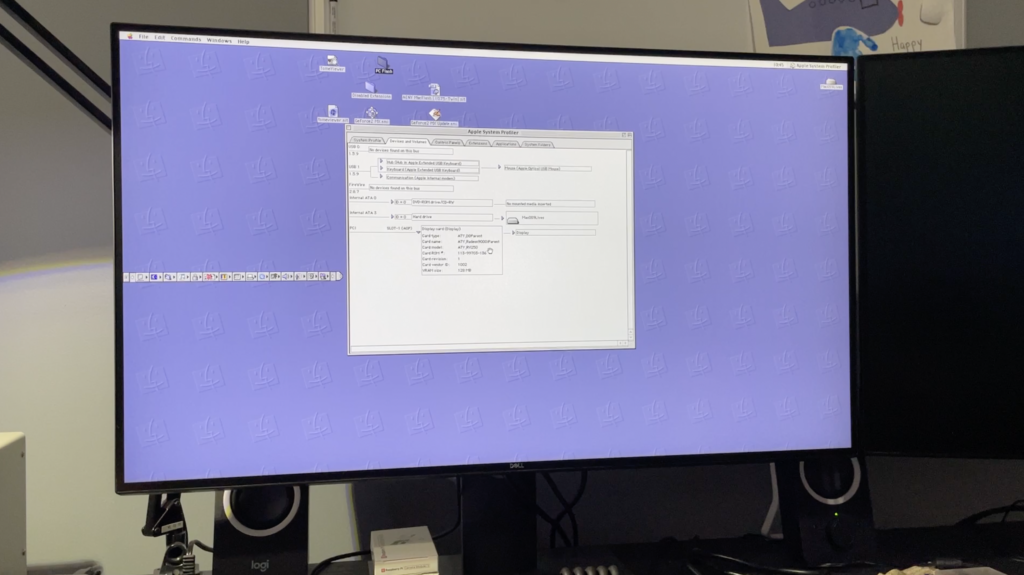
With the card reinserted into the Power Mac we boot right up! Until the ATI drivers are installed there will be no hardware acceleration. The ones I’m currently using are the drivers supplied with Mac OS 9 Lives 9.2.2 and they are working great. 🚀

Power Mac G4 running a Radeon 9000 Pro PC version
Categories
Tutorials

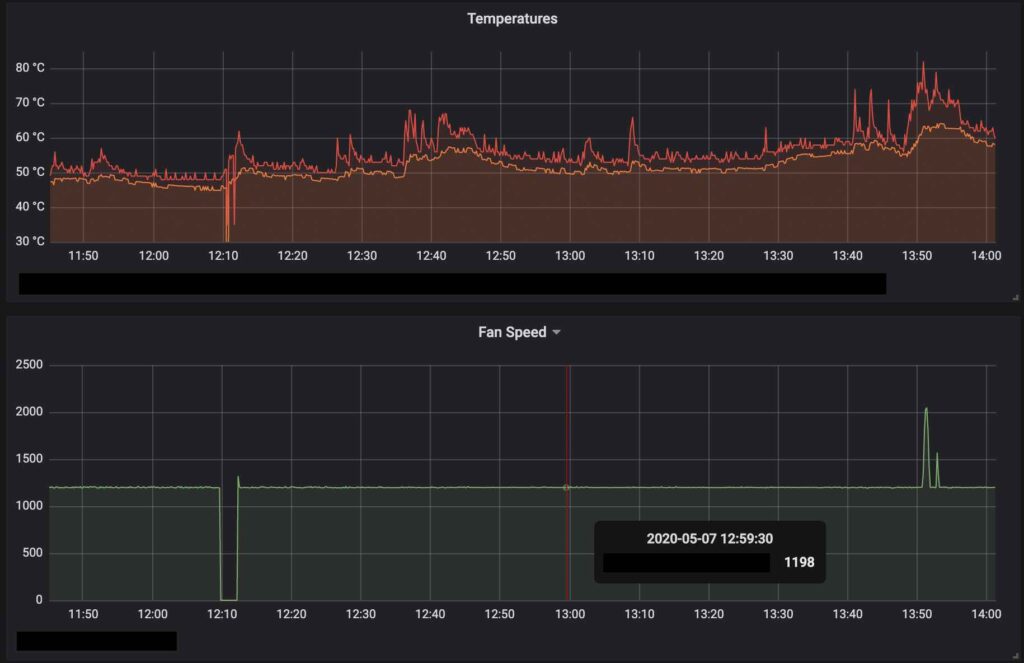
macOS CPU, GPU, and fans in Grafana

Graph all the things!

I know I talk about Grafana way too much, but it’s such a cool tool. Installing Telegraf on Linux gets me about 80% of what I want, but on macOS (via Homebrew) it’s lacking even more.

Note: I use InfluxDB as my Telegraf output.

The Telegraf part

To get values for my Mac’s CPU temperature, GPU temperature, and fan speed, here’s what I did:

  1. Install iStats: https://github.com/Chris911/iStats
  2. Add the following executable inputs to Telegraf’s config in /usr/local/etc/telegraf.conf
# CPU temperature from iStats - https://github.com/Chris911/iStats
# Note - this would need to be adjusted for multiple CPUs
# Key was discovered as TC0P
[[inputs.exec]]
commands = ["/usr/local/bin/istats cpu --value-only"]
timeout = "5s"
name_override = "cpu_temperature_mac"
data_format = "value"
data_type = "float"

# GPU temperature from iStats - https://github.com/Chris911/iStats
# Note - this would need to be adjusted for multiple GPUs
# Key was discovered as TCGc
[[inputs.exec]]
commands = ["/usr/local/bin/istats scan TCGc --value-only"]
timeout = "5s"
name_override = "gpu_temperature_mac"
data_format = "value"
data_type = "float"

# Fan speed from iStats - https://github.com/Chris911/iStats
# Note - this would need to be adjusted for multiple fans
[[inputs.exec]]
commands = ["/usr/local/bin/istats fan speed --value-only"]
timeout = "5s"
name_override = "fan_speed"
data_format = "value"
data_type = "integer"

The Grafana part

CPU and GPU temperature queries in Grafana
Fan query in Grafana

Some caveats to this approach:

  • This was on a 2019 i9 iMac with a single processor, GPU, and fan and won’t automatically work for all machines. You’d need to run iStats to see what all keys and values appear for your particular Mac.
  • It would be better if the CPU and GPU stats all played nice with the same measurement names Linux uses so we wouldn’t have to have multiple Grafana queries. I may do this in the future, but right now this was easy to implement with my RPi, PC, Mac, and Linux boxes.
Categories
Tutorials

Mounting partitions contained in a disk image in Linux

Say you have a disk image created using ‘dd’. You want to mount a partition contained on it but you realize it’s not as simple as just mounting the image and exploring the path.

The kpartx utility can help with that:

sudo kpartx -av disk.img

This should have created some partition mappings to /dev/mapper. Now, just mount the correct mapping the same way you would mount anything else. For instance:

sudo mount -t ntfs -o ro,noexec /dev/mapper/loop0p1 mounted
Categories
Tutorials

Ubuntu and PCMCIA card

After installing Ubuntu Server 10.04 LTS on an old laptop (don’t ask why) I found that it wouldn’t detect its PCMCIA wired Ethernet card (PCM100).

Solution:

  1. Copy over the packages pcmciautils and libsysfs2 (I had to download them and transfer via USB flash drive: pcmciautils, libsysfs2)
  2. Install the packages: sudo dpkg -i [name].deb
  3. Reboot

Voilà!

Categories
Tutorials

Cloning a drive the ‘dd’ way

Here’s how I cloned a drive with bad sectors using ‘dd‘.

Since I did this on a Mac, I saved the output image file as a ‘.img’ file. This would give me the ability to mount the image after I created it if I needed to get individual files.

Clone the failing drive to an image file, skip bad sector errors with ‘noerror’:

  1. Connect the drive to a Unix / Linux machine – do not mount the disk
  2. Find the drive name in /dev (for me it was /dev/disk1)
  3. Verify the host system has enough local storage to create the image, and in a terminal type:
    sudo dd conv=noerror,sync if=/dev/disk1 of=disk.img
  4. Give it time to create the image. You may see errors when it hits bad sectors, but it’ll keep running thanks to ‘noerror’.

Copying from the image file to the new drive:

  1. Connect the new drive and make sure it isn’t mounted (if it’s really new it shouldn’t have any file system or partitions at all)
  2. Find the drive name in /dev (for me it was /dev/disk1)
  3. Type in a terminal:
    sudo dd conv=noerror,sync if=disk.img of=/dev/disk1
  4. Give it time to copy from the image to the new disk.

The nice thing is that it copies everything. For me, the MBR was still there along with all partitions. If you wanted to just copy a single partition you could just be more specific (/dev/disk1s1 or however your system represents them). If the new drive was larger than the original drive, you’ll notice that there will be unallocated space. You can either create a separate partition, or use a utility to grow an existing one. Recent versions of Windows and OS X have this capability built in.

On boot, the machine I was repairing recognized the filesystem was dirty (it was a Windows XP machine / NTFS), and immediately ran a SCANDISK. I also manually ran it again once I booted into the system, and also ran ‘sfc /scannow’ to verify the system files were intact.

That’s all you have to do. No expensive cloning software needed, just the power of Unix / Linux.

Categories
Tutorials

Nagios alerts using sSMTP

I’ve been running Nagios on my systems at home (yes, I’m that big of a nerd) for a week or so, but didn’t get around to setting up e-mail alerts until now. There are a few ways to go about doing this, but I’ll describe the way I got it going. Since I’m not running a mail server on any of my machines I use Google Apps to handle e-mail for my domains. I rather have ‘the Google’ deal with all of that for me (and they do a great job).

For this particular instance I was running Ubuntu Server 8.04.4 LTS, but these steps should work fine on other versions and distros.

1. Install sSMTP and mailx

sudo apt-get install ssmtp mailx

2. Configure sSMTP by editing /etc/ssmtp/ssmtp.conf

# Config file for sSMTP sendmail
#
# The person who gets all mail for userids < 1000
# Make this empty to disable rewriting.
root=[your user account]@[yourdomain.com]

# The place where the mail goes. The actual machine name is required no 
# MX records are consulted. Commonly mailhosts are named mail.domain.com
mailhub=smtp.gmail.com:587

# Where will the mail seem to come from?
rewriteDomain=

# The full hostname
hostname=[some hostname here]
UseTLS=YES
UseSTARTTLS=YES
AuthMethod=LOGIN
AuthUser=[your user account]@[your domain]
AuthPass=[your password]

# Are users allowed to set their own From: address?
# YES - Allow the user to specify their own From: address
# NO - Use the system generated From: address
# This is optional if you're going to use revaliases - I didn't
FromLineOverride=YES

3. Lock down /etc/ssmtp/ssmtp.conf to help protect your plaintext password

sudo chown root:nagcmd /etc/ssmtp/ssmtp.conf
sudo chmod 640 /etc/ssmtp/ssmtp.conf

4. Alter your Nagios commands.cfg file for the correct mail path (for Ubuntu at least)

sudo vim /usr/local/nagios/etc/objects/commands.cfg

And change all instances of /bin/mail to /usr/bin/mail. Be sure to reload your Nagios configuration after making these changes.

That should be it! If you’re having trouble, break things down to troubleshoot. First test out sSMTP by doing the following:

sudo -vvv ssmtp somebody@somedomain.com

Write a message, press enter, then hit CTRL+D. If that works successfully but Nagios still isn’t sending alerts, be sure to check the Event Log in the Nagios interface to see if there are any errors.

Categories
Tutorials

Going back to the black Twitter app icon

It appears that with the latest update, Twitter has replaced their dock icon from the original sleek black color to a brighter blue. I really liked the original black, so this is how I went back to it.

1. Download the original icon here
2. Open up Applications and find the Twitter app
3. Right-click the app and select ‘Show Package Contents’
4. Go to Contents, then Resources
5. Locate ‘Icon.icns’ then copy and paste itself in the same folder (this is optional, but we’re creating a backup)
6. Put in your password if prompted
7. Take the file you downloaded in step 1 and paste it into the same folder
8. Click ‘Replace’ when prompted
9. Put in your password if prompted
10. Move the Twitter app out of the dock, then load it up

You’re done! You should now have the original black Twitter app icon.

Keep in mind that with any future updates, you’ll probably have to repeat this process.

Categories
Tutorials

Preventing a volume from automatically mounting in OS X

Heads up! This is a really old post that will contain outdated info for modern macOS!

In a previous post I mentioned that I was going to install Snow Leopard on a smaller, separate partition. After doing this, I realized that both partitions were going to be mounted when I booted into either operating system – Leopard or Snow Leopard. I wanted to prevent Spotlight from trying to index the files on both as I’d have duplicate entries for files and applications. I tried to disable indexing the Snow Leopard partition from the Leopard in Spotlight’s preferences, but for some reason this configuration was stored universally meaning Snow Leopard would also exclude its own partition and only include Leopard’s. The best thing to do at this point was to keep the partitions from being mounted at the same time, and as separate as possible.

Before we start I must say I don’t recommend anyone who may be slightly scared of the Terminal, “vi”, and or possibly really screwing something up to do this. If you have access to a nerd who knows what they’re doing, I suggest you grab them. I’m not responsible for any hosed systems.

To keep any partition from automatically mounting in OS X do the following:

1. In Terminal, run “sudo vifs”

Why we run this:

The command “sudo” just means run the command after it (in this case “vifs”) as another user, namely root – so that we can make changes to files regular users normally wouldn’t have access to.

The command “vifs” is a utility to safely edit the “/etc/fstab” file – the configuration file we’re going to tell to not mount our partition. The “vi” part is actually from the fact that we’re using the text editor “vi” to change our file.

2. Add the entry of the partition you want to keep from mounting

If the file “fstab” in /etc/ didn’t already exist, vifs will generate it for you. If it did already exist and there were entries, you’ll see them listed. Most users will just see this:

#
# Warning - this file should only be modified with vifs(8)
#
# Failure to do so is unsupported and may be destructive.
#

What we want to do now is add our entry. This can be tricky for people who aren’t familiar with the wonderful world of the vi text editor. Move the cursor down to the last line (with the down arrow key or by pressing shift+G) and then go to the end of that line (by pressing the right arrow or ‘)’). Press ‘i’ and hit the right arrow over one, then press enter to create a new line. At this point you should be able to type text on a new line.

Here’s an example entry of what we’ll put on that line:

UUID=12A4B6C8-1A3B-1C3D-6E8F-123456789876 none hfs rw,noauto

There are four parts to each entry we need to supply: partition, mount point, file system type, and options. All of the things you can do in fstab are way beyond the scope of this article. Running “man fstab” will give you plenty of information if you need to do something different.

In OS X one way to get the UUID for the partition is to go to Disk Utility, right-click on the partition you want to prevent from being automatically mounted, and select “Information”. From there you will be able to copy the “Universal Unique Identifier” line. Pasting it into our Terminal window is as simple as right-clicking and selecting “Paste”.

“none” simply means we’re not giving it a location to mount – this will be handled automatically by OS X.

“hfs” is the type of file system we’re dealing with. Since my partition was a Mac OS Extended (Journaled) type, this is what I used. If the partition is another type, this must match what type it is. This information is also explained in “man fstab” and many places on the web.

“rw,noauto” is our options. “noauto” tells OS X not to automatically mount the partition.

After you’ve added your line, your Terminal should look close to this:

#
# Warning - this file should only be modified with vifs(8)
#
# Failure to do so is unsupported and may be destructive.
#

UUID=12A4B6C8-1A3B-1C3D-6E8F-123456789876 none hfs rw,noauto

To save our file and quit hit “esc”, then type “:wq” and press Enter. If something went wrong and you want to exit vi without making any changes, type “:q!” instead.

Reboot to test this out and you should be good to go. If you want to, check out your system logs in Console to make sure there weren’t any fstab errors.