For ~$50 you can find digital “microscopes” on Amazon that save images to SD cards. Here’s an iPhone OLED screen displaying the letter “T”.
All the colors you see on your phone, computer, TV, etc. are just some additive combo of red, green, and blue. In the manufacturing process of these newer “diamond” layouts you’ll find that the green sub-pixels are physically smaller – this is because our eyes pick up green the best (it’s in the middle of the visible electromagnetic spectrum). ROYGBIV 4lyfe.
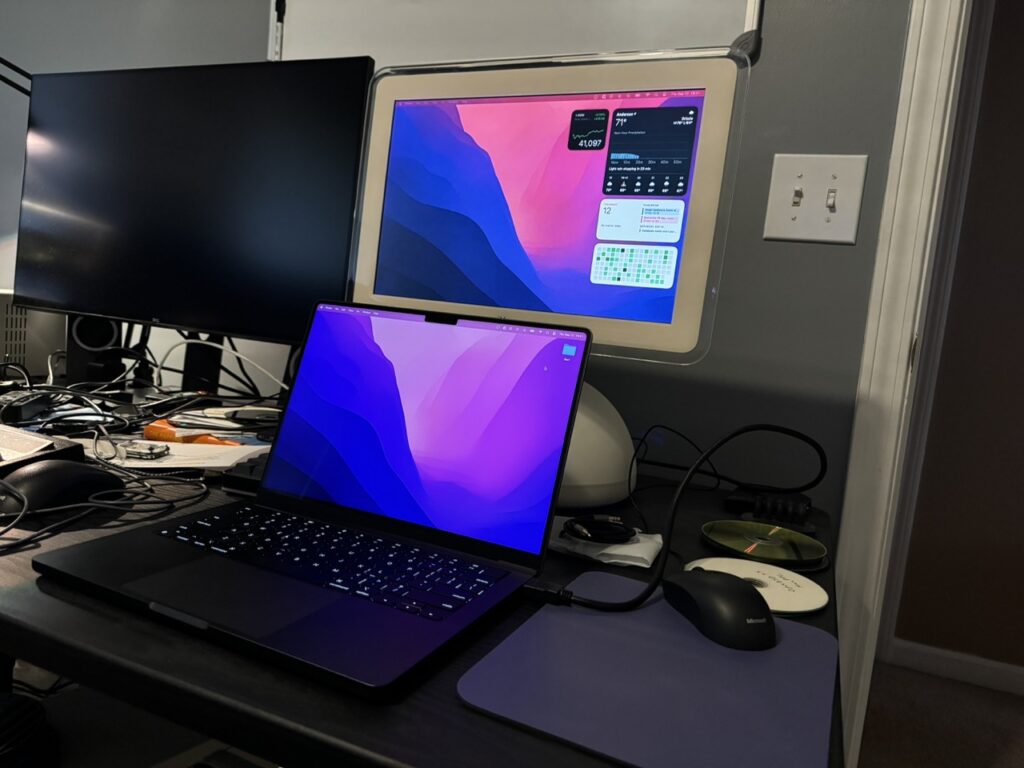
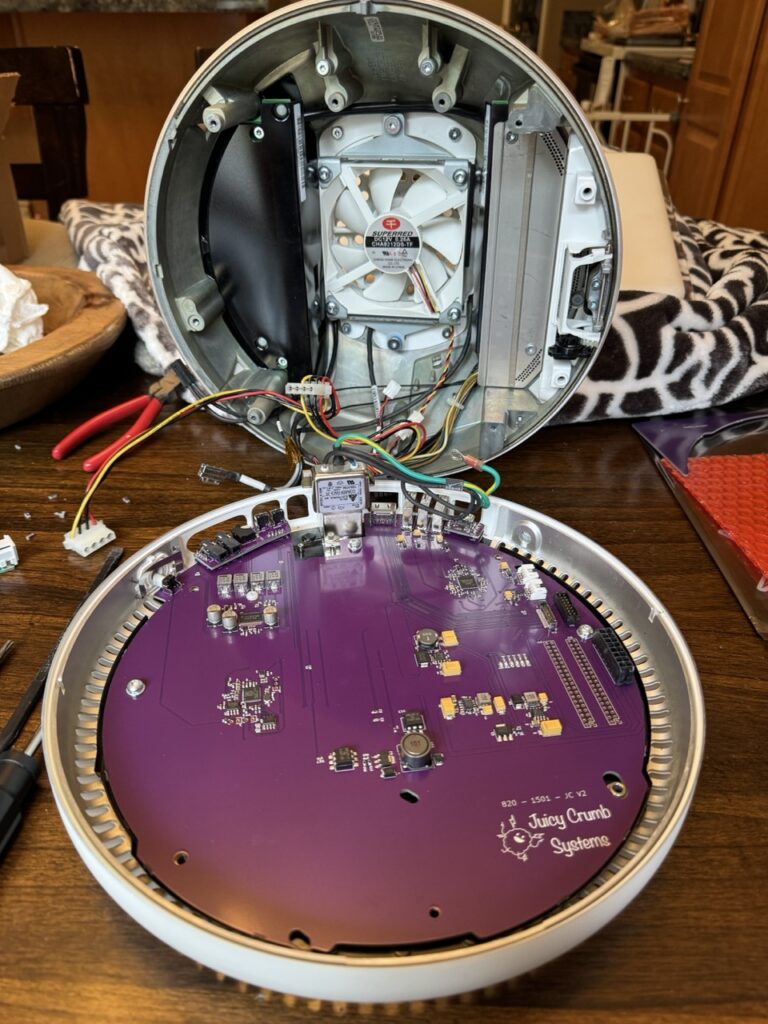
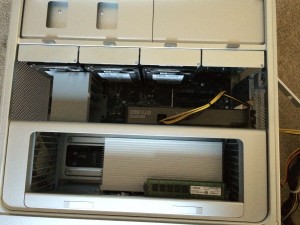
Overall, the instructions make sense – pull out the old PPC logic board, pop in the DockLite G4 board, connect power and the display, and you’re kinda done.
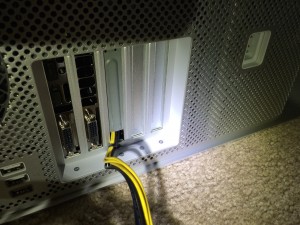
The board also features a USB hub, a speaker amplifier, and brightness-adjustment buttons. They all line up nicely with the back of the chassis, even if it’s not airtight, Apple-level industrial design.
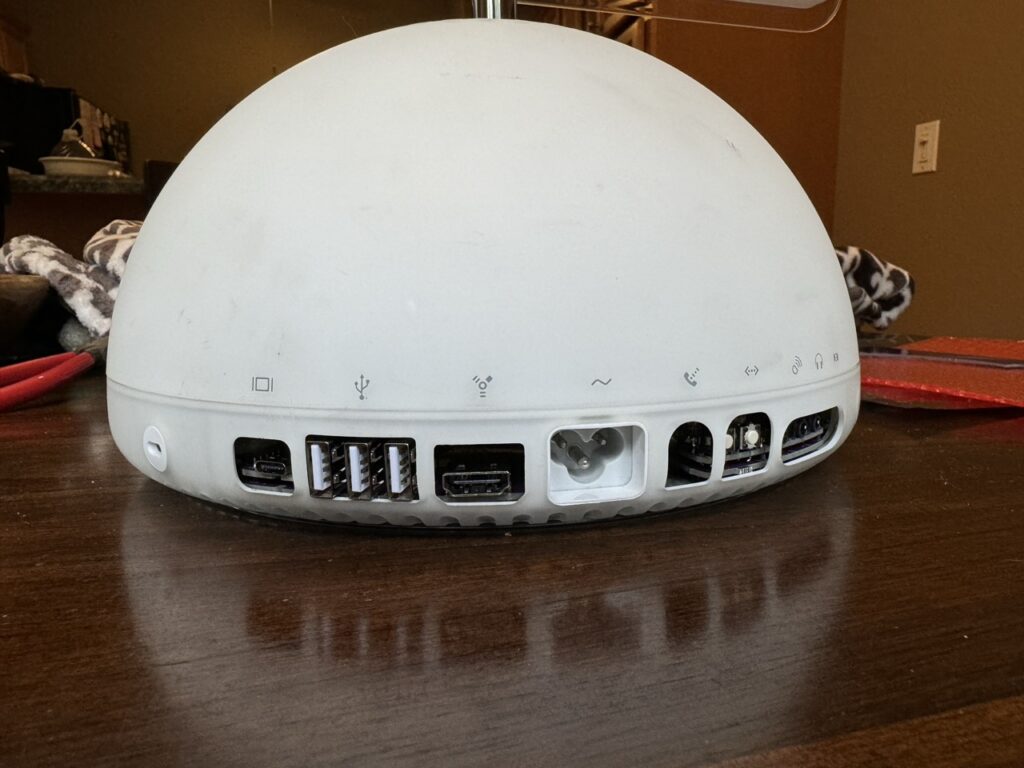
DockLite G4 ports
Software control
If you’re running a Mac you can install Juicy-Link and connect to the USB hub to set the display brightness and upgrade firmware. It’s simple to install and seems to work well (as long as it’s a Mac).
Their software is currently only available on macOS although their website claims Windows support is coming soon. Software control is better than nothing, but still not as nice as DDC/CI. If you find yourself on something other than macOS you’ll need to reach around the back and press the buttons to adjust the brightness.
More disappointing is that the display doesn’t support sleep mode, so turning off the backlight requires pressing the physical power button in the back. This makes the challenge of preserving an old backlight even harder.
The good news is that I think much of this can be fixed with software and firmware updates, so I’d love to see that happen.
It’s still an old LCD
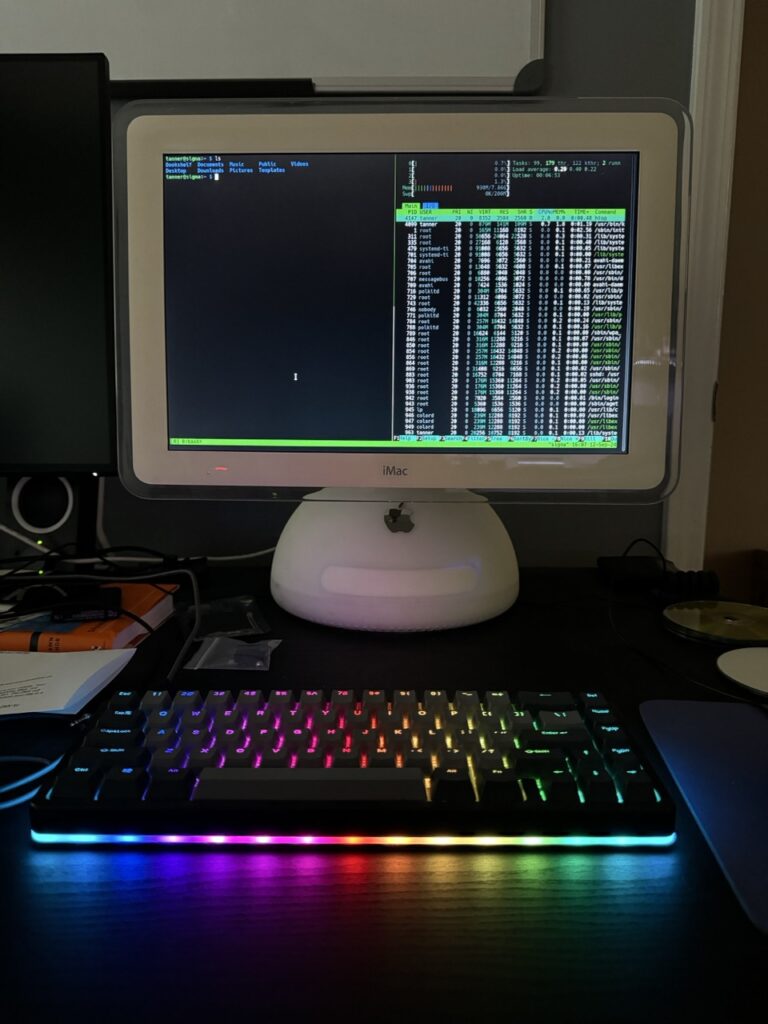
Modern macOS looks great on this design (round all the borders!), but your eyes won’t be fooled coming from HiDPI Retina displays. LCDs have come a long way with higher resolutions and greater pixel densities, uniform and bright LED backlights, wider viewing angles, and higher refresh rates to name a few. This display has none of that. It’s not a suitable daily driver for my eyes, but it works great as a toy.
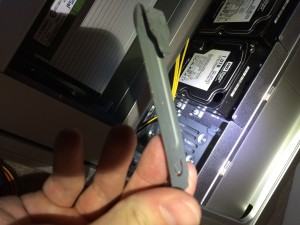
The drives can go
Juicy Crumb recommends that you leave the CD-ROM and HDD installed so the base retains a proper weight for stability. Interestingly their instructions don’t have you unplug the power from these drives even though they aren’t in use.
I understand keeping things simple, but the type of user who is disassembling an iMac G4 can surely unplug a couple cables to reduce unnecessary power consumption and strain on an old PSU.
I removed both from my 17″ system and I have no concerns about its stability. I recommend doing the same. Plus, you’ll get better airflow with the system fan (although I question if that’s really necessary, too).
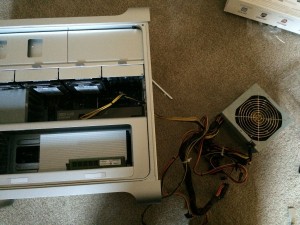
Old PSU is old
Although Apple is known for high quality hardware, installing this board doesn’t really lower the risk that the 20+ year old power supply will fail and burn something up. It’d be nice to have an alternative DC input like a barrel pin connector.
The original fan is audible
Do yourself a favor and replace the factory fan with something modern and quiet. Without a hard drive and CD-ROM spinning away, the fan becomes more noticeable. The replacement should be a standard size, though you may want to match the color—anything non-white might be distracting.
Final thoughts
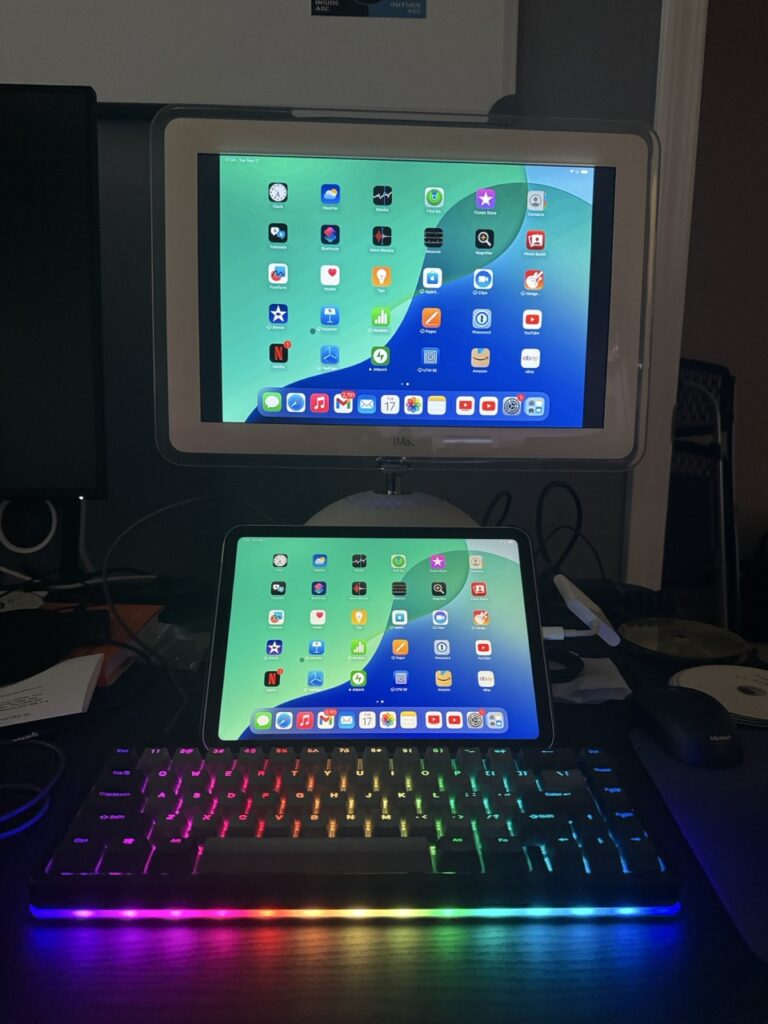
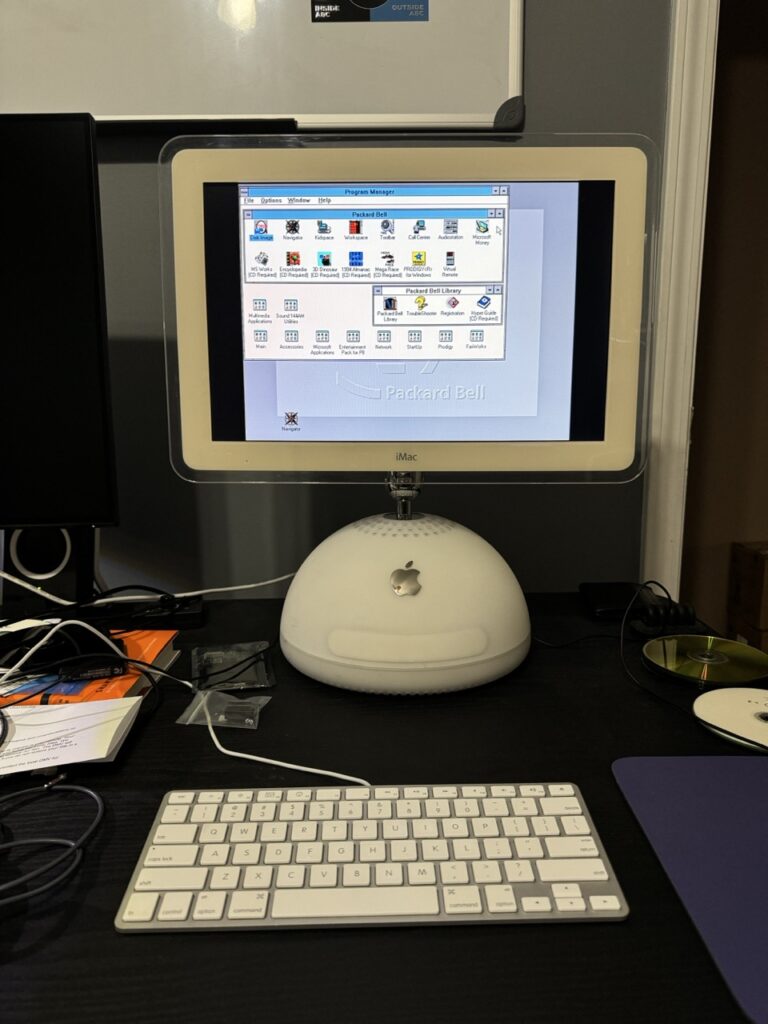
Raspberry Pi OSiPadOSWindows 3.1
I’m really happy with the purchase and have had a blast playing around with different systems. If you’ve got a compatible iMac G4 and want to do more than Mac OS 9, this is a great solution. Just promise that if you order one and don’t want your Tim Tam biscuit, you’ll send it my way.
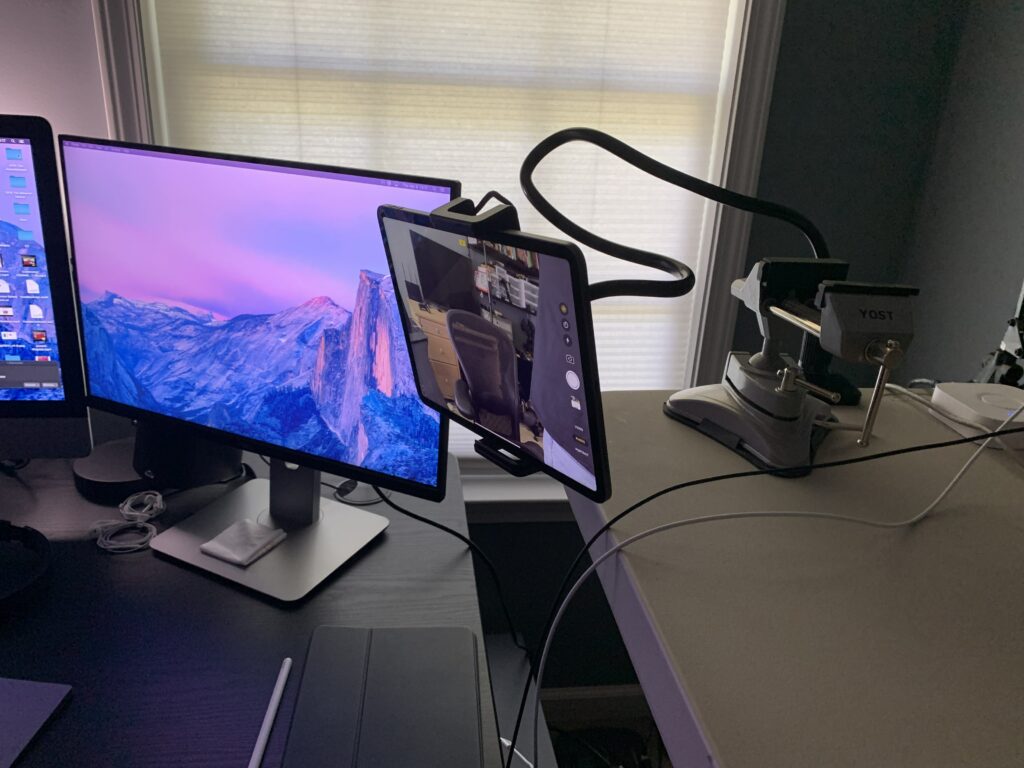
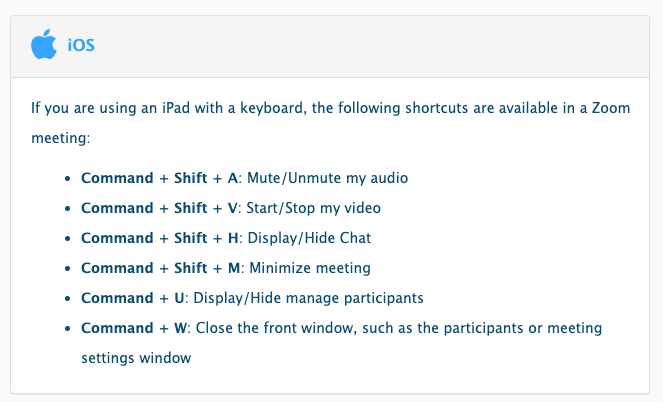
At work we’re primarily using Zoom for meetings while we’re in remote mode. Due to the recent problems found in their desktop software, I run it only on my iPad to provide a little more security (thanks to iPadOS’ sandboxed environment), plus the front facing camera on my iPad Pro is superior to my iMac and MacBook Pro’s.
The first issue I found with this setup was that I wanted to get the iPad into a position more perpendicular like a web cam, rather than the angled up shot below my face. I don’t think anyone wants to look up my nose unless I’m on a telehealth call, so I ordered this flexible stand for about $25 from Amazon and got it mounted:
Trying to bend this thing will give you a workout.
So far so good, until my first meeting. I wanted to follow conference call etiquette by muting myself when I wasn’t speaking, but it was a pain to reach and manually tap the mute button every time. Plus, although the flexible arm is super strong, it’s still going to wobble wildly if you touch the iPad and your video is going to show that.
Was there a way I could toggle muting myself without touching the iPad? After a quick Google search, the answer was YES!
The attached keyboard (Smart Keyboard Folio, Magic Keyboard) didn’t make any sense in this case, but a Bluetooth keyboard would be perfect!
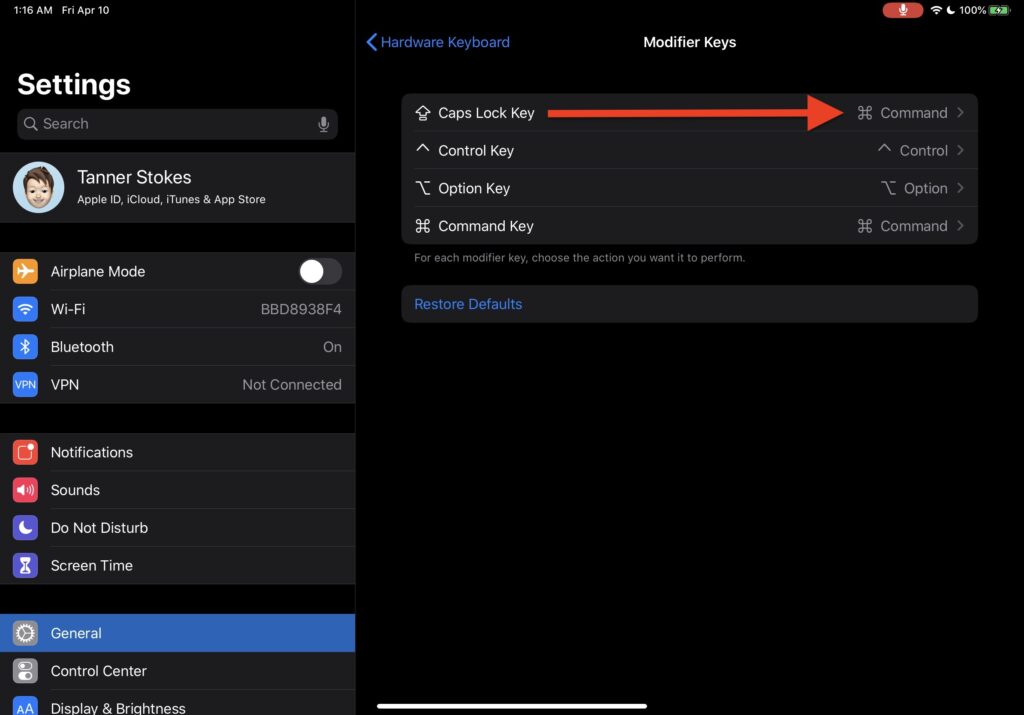
Logical answer
The logical answer is to connect up a Bluetooth keyboard and hit Command + Shift + A when you want to toggle muting your mic, and you’re done. That’s it.
I’m not totally logical
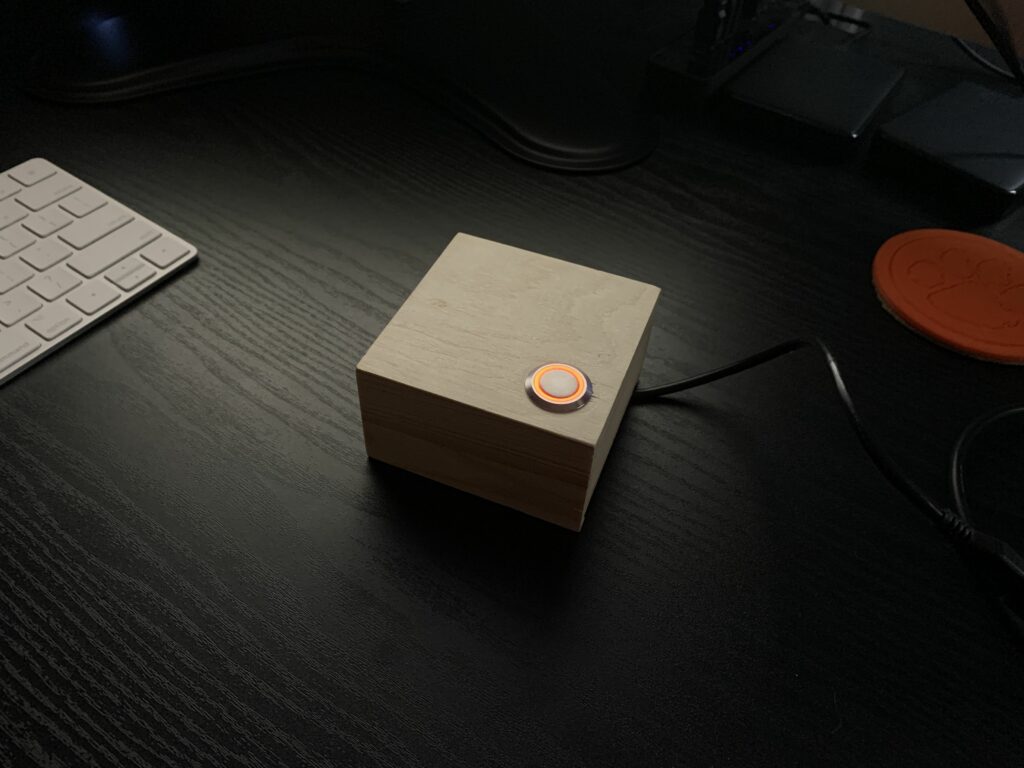
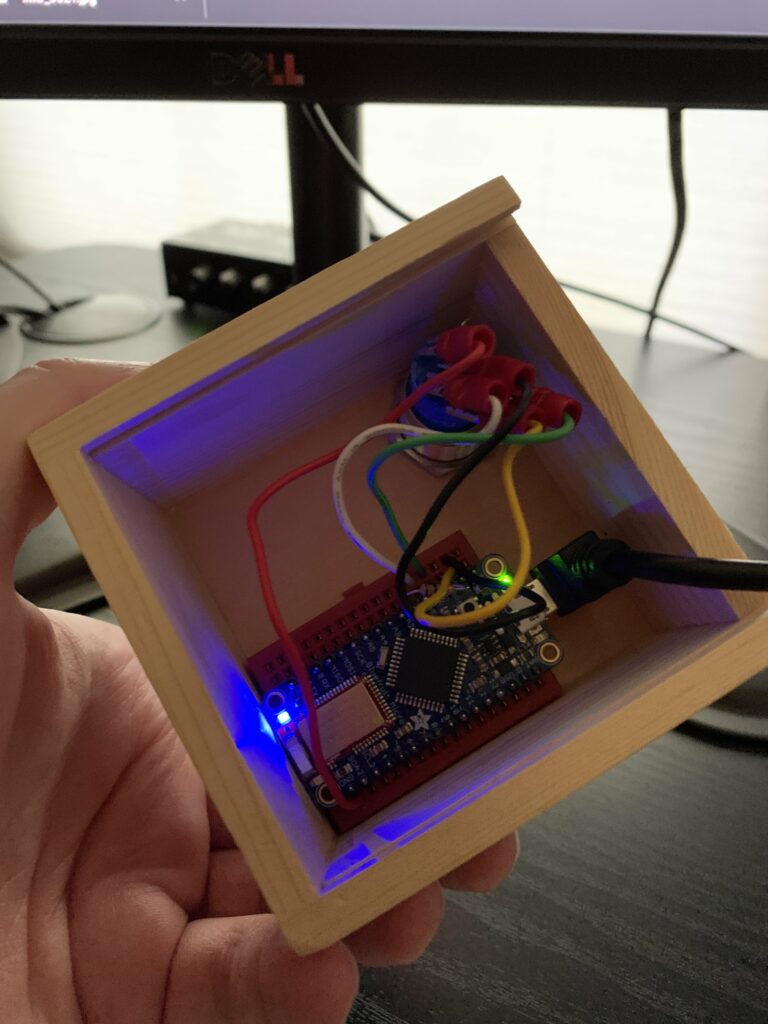
Of course, the route I chose was different. I have enough keyboards on my desk, I really just want one button to do one thing.
This is as if the user pressed “shift + caps lock”, and then “shift + a” at the same time, then released. Now the Zoom app was getting the proper command from a Bluetooth “keyboard”.
Hardware
This setup is virtually identical to what I have here, it’s just a different button.
The USB cable coming in is only for power, and if I had the Adafruit Feather version on hand I would’ve used that with a battery so the box would be totally wireless.
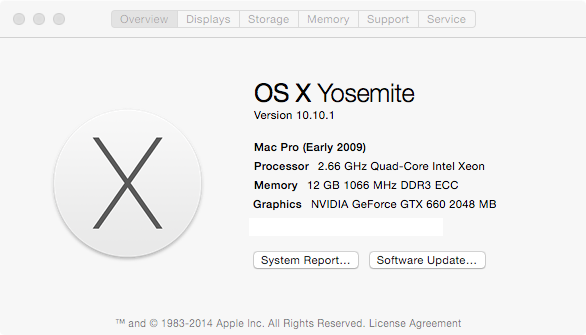
After upgrading to Yosemite, I noticed that graphics performance was starting to lag a bit on my 2009 Mac Pro while driving two monitors at fairly low resolutions. At one point I had two GT 120s running separate monitors, but after one replacement and two failures, I was back down to one.
GT 120
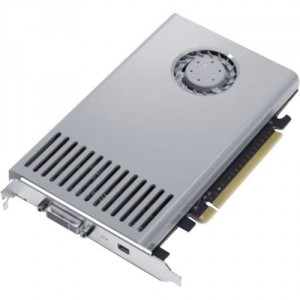
I decided to look into upgrade options and was happy to see that OS X now supports non-EFI video cards. The only catch: You won’t see anything displayed until OS X loads your drivers. Who cares?
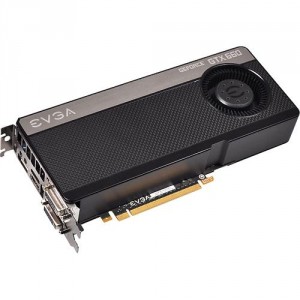
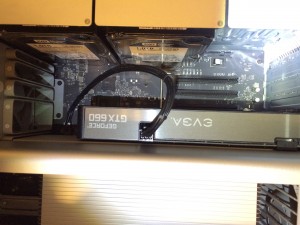
I settled on an EVGA GeForce GTX 660 2GB, which Best Buy happened to sell. I can feel the judgement from the hardcore nerds for buying something at Best Buy. Nevertheless, this was much cheaper than trying to buy another GT 120 to replace my second one and offers WAY more power. I don’t game on my Mac – I just want the OS to feel snappy and fluid.
GeForce GTX 660
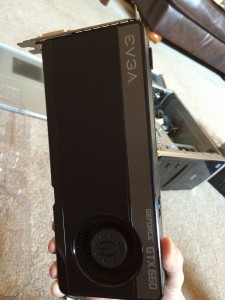
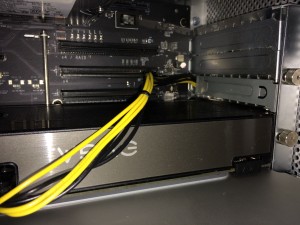
Like many powerful cards, the GTX 660 requires the PCIe 6 pin power connector from the power supply or motherboard. I’ve ordered this, but until it gets here, I’ve rigged up an external power source.
With an Arduino Ethernet, Processing, and a Kinect, I was able to easily create this little demo where hand movement can control a servo. This is just a tiny step in my master plan to create a robot clone so that I don’t have to leave my chair.
The following libraries and drivers made this work and also made it super easy for me to create it:
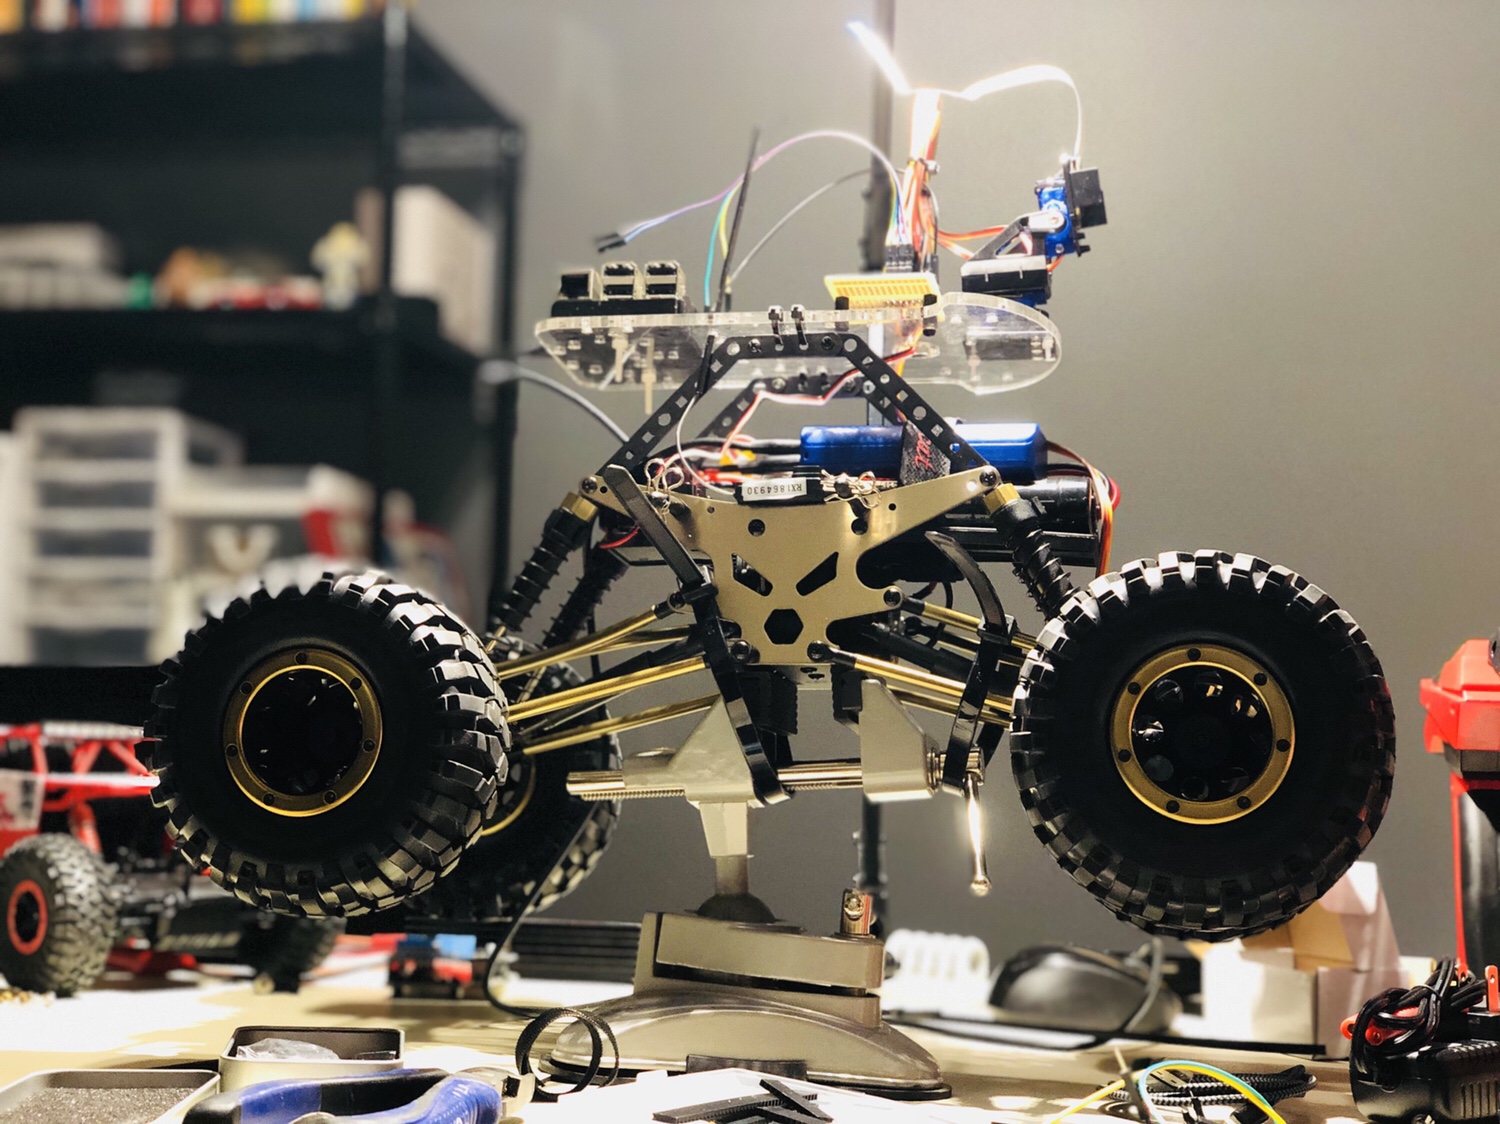
Pretty stoked to finally get one! So far I’ve dissected an old RC car and turned its wireless receiver board / remote into a volume controller for my Mac. I foresee many cool projects…
I played around tonight with making my iPod touch an auxiliary display. I thought it may be neat to just have random real-time public tweets cycle through on it so I made the following. As you can see there’s nothing too smooth about it yet – no AJAXiness implemented as this was purely proof of concept.